Overview – developed by Idea Factory, Compile Heart and NOWPRO with publishing handled by Idea Factory International, Death end re;Quest: Code Z is the third entry in the brutal horror RPG series. In the world of DE-1.5, follow Sayaka Hiwatari, who gets wrapped up in a crisis that threatens the world itself. This version of the game is currently exclusive to PlayStation consoles, with a link to the game at the bottom of this review.
Disclaimer: before I get into the review, I would like to thank Idea Factory International for providing the copy of Death end re;Quest: Code Z that was used for this piece, via the Keymailer service. The provision of this software has not influenced the contents of this review, all thoughts and opinions contained within are my own.
Mature Content Disclaimer: this title features graphic depictions of violence, grotesque imagery, suggestive scenes and strong language. Due to that, this title has been rated Mature. If you are sensitive to violent imagery or graphic content, please proceed at your own discretion.

Now with the introductions out of the way, let’s get into the review, starting with the story. For this review, I will be covering the experience that most players will have in the normal difficulty, this is due to changes to mechanics in other settings. I have previously covered Death end re;Quest which can be found (HERE) and the sequel which is (HERE).
Story – in World DE-1, Iris was born which set in motion a series of tragic loops. These were unravelled by Arata Mizunashi and his team. After this, Iris created a copy of the world named World DE-1.5. Here, each person is a perfect cog in a perfect world. But a new crisis threatens the peace of the world, a mysterious figure has appeared with a group that resemble the world’s former heroes. Now Sayaka Hiwatari must confront the chaos to restore the peace.
Gameplay – This game follows the same style of Visual Novel and RPG hybrid, which is a staple of the games in this series. The player takes the role of Partner to Sayaka Hiwatari, an unseen presence only known to the protagonist and a few select characters. Throughout the game, there will be VN narrative scenes, which is how the story plays out, showing Sayaka interacting with the various characters of the world.
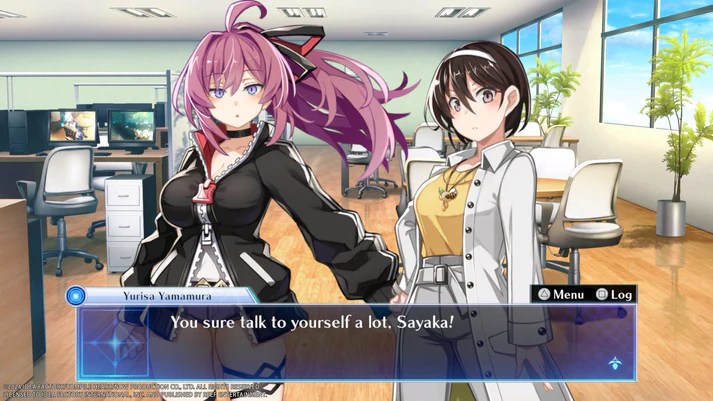
These scenes occur throughout the chapters of the game, separated into main and sub-story scenes, shown on the City Map. The different scenes are depicted with distinct icons, with the main story being a white exclamation within a red box, with the sub-stories being the inverse. In many of the scenes, the player will be given a choice of dialogue, which will provide the chance for a different outcome. The story may change significantly depending on the choices made.
The sub stories are optional, but can be very important and expand the story. There will be details in these secondary narrative slices that may tie into the overall story, providing details away from the main protagonist. If the player attempts to ignore these side scenes, the player will be given a prompt, telling them that they will be missed. In the event that players ignore these extra scenes, the narrative may get confusing so it is worth taking the time to view them.
At set points throughout the narrative, the player will be prompted that a dungeon segment will occur. While the majority of the experience takes place within Sagami City, there is a world that exists within a parallel dimension. This place is called the Strain Area, a world that has distorted elements related to the real world within it. This is where the real meat of the game lies, as this game is also a challenging isometric dungeon crawling RPG.

When Sayaka enters the Strain Area, they will need to navigate their way through several floors to reach a goal point. These dungeons contain various enemies and traps, which will seek to bring an end to Sayaka. Each time the player enters a dungeon within the Strain Area, the layout will be randomised, making every excursion into the dungeon unique. Here the player controls Sayaka, with the objective of most dungeons being to rescue a captive heroine.
As the player attempts to navigate the grid based floors of a dungeon, each action is counted as a turn. The actions that can be made are movement, attacks and using items. But it is important to know that with each turn the player makes, the horrific inhabitants of the dungeon will also act within the dungeon. There are many dangers that dwell within the depths of the Strain Area, moving through the rooms and corridors of each floor.
The enemies that Sayaka will face are dangerous, with the ability to bring a swift end to her life. These foes are not of the world she lives, but are Strangers, beings that dwell within the distortion of the Strain Area. At the start of each floor, the player will be relatively blind to their surroundings, as the mini map will fill out during exploration. Enemies will show on this mini-map as red dots, moving around in the rooms and corridors on random paths.
If the player encounters an enemy within the dungeon, then battle may occur. Sayaka is armed with a sword at the start, which allows her to attack directly in front of her from 8 different directions. Her main attack is to swing the sword, targeting the enemy in the direction she is facing. If the target is still alive after the attack, they will often respond with violence, dealing damage to her. Enemies can also give negative status ailments to the player.
Some enemies have effects like reducing attack, defense and speed. These negative effects will only last for a limited time, but can lead to taking massive amounts of damage and a high chance of death. Each enemy has an attribute applied to them, split between the Moon, Sun and Stars. Each of these are strong to one but weak to another. This gives the combat a paper, scissors, rock style, which can make it more tense and exciting.
As enemies fall in battle, experience points will be awarded, with Sayaka gaining levels when hitting set milestones. Each time her level increases, her maximum health and other stats will increase, strengthening her in the dungeon. If any damage is taken in combat, Sayaka will be able to “walk it off”, regaining health with each step she takes. However, that isn’t the only way for Sayaka to recover from the injuries she suffers.

Throughout the floors, Items can be collected with many different things that can be found. The most common are recovery items that restore lost health. But there are more items that can be found, with power-ups to increase damage, put enemies to sleep and even unleash deadly attacks. Some items even reveal the map, or parts of it, giving an advantage. But inventory space is limited, so effective item management is key to survival.
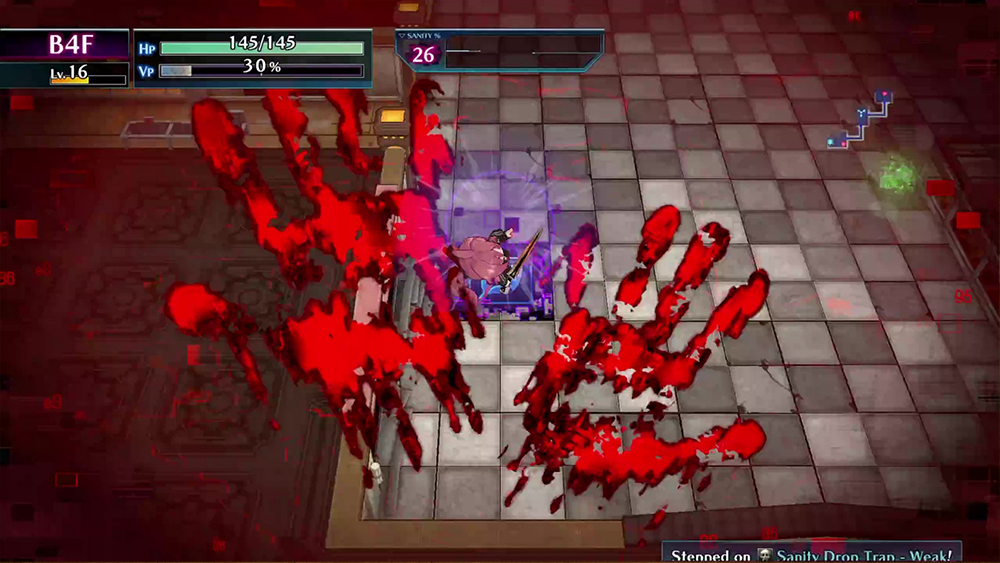
Now, enemies aren’t the only danger that exists within the dungeons of the Strain Area, as there will be traps hidden throughout the different floors. These traps can deal damage with spikes and laser beams, immobilise Sayaka or inflict her with sickness. As the traps are hidden, they will only be seen by stepping on them or attacking the space they are in. There are many traps, but the most dangerous of them damage Sayaka’s Sanity.
Speaking of Sanity, this is one of the most unique mechanics of dungeon exploration. Each time Sayaka delves into the Strain Area, she starts with her Sanity at 100%. This will gradually decline when moving, taking damage and from the traps of the Strain Area. As it decreases, Sayaka will fall deeper into madness, reducing her field of view and map visibility. If it falls too low, she has an increased chance to harm herself, reducing her chances of survival.

It is possible to recover Sayaka’s Sanity by using special Ether items, which will restore her sanity and calm the heart beat monitor that is on screen. These items are the most important when it comes to surviving the strain Area, as running out can lead to certain death. So ensuring effective management of Sayaka’s mental state adds further stress to the Strain Area, which is just another thing that players will need to manage as well as health.
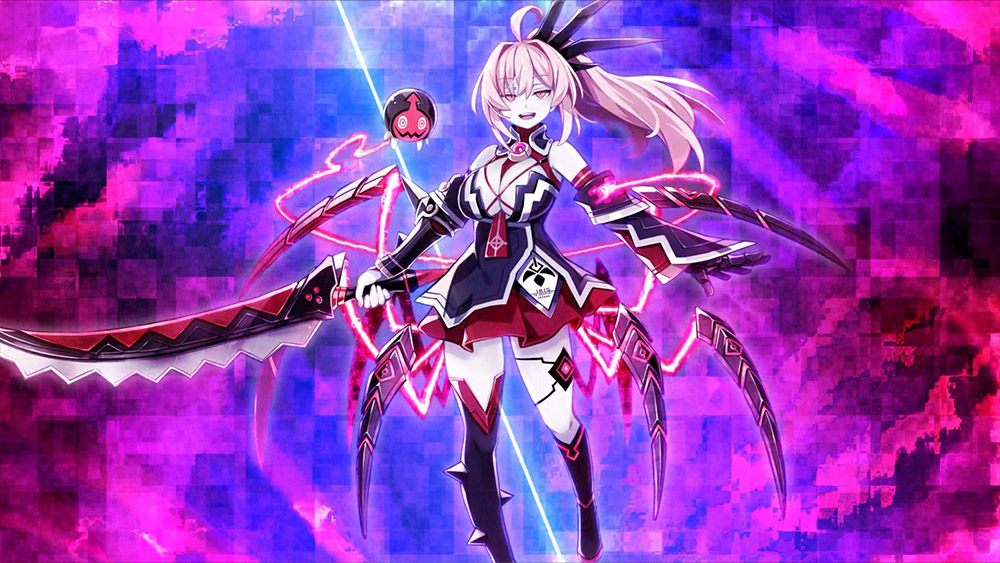
When the player reaches set points in the dungeon, the player will encounter horrific monsters which are twisted forms of those in the real world. These enemies are the most dangerous combatants in the Strain Area, as they have incredibly powerful attacks, which can eliminate Sayaka quickly. In these battles, it is pretty easy to die so the player may need to unleash Sayaka’s ultimate power, the Vanquish Style.
Defeating enemies within the dungeons will provide her with Vanquish Points, which will fill up the VP gauge below the health bar. When this meter reaches MAX, Sayaka can transform into her all powerful Vanquish Style. While transformed, she will have increased attack, negative effects are nullified and can even survive a killing blow. This form lasts until the meter expires, causing Sayaka to revert back to normal afterwards.
If the player is able to defeat the boss, the creature will release the captured heroine that the player needs to rescue. This starts an equally stressful situation for players, an escort mission to an exit where they follow Sayaka. During this section, it is possible for Sayaka and the companion to die, which further adds to the stress of the extraction. But there is one more hazard that will make survival even more of a struggle.
Born from the memories of past events in the Death end story, there are beings known as the Glitch Girls. These manifestations of the past are the most powerful entity that can appear, posing great danger to those who enter the Strain Area. They can appear at any time before or after a rescue, hunting the player and attacking with overwhelming power. It is possible for them to destroy dungeon exits, further increasing the difficulty of escape.
If the player can escape, they will receive a rating based on their performance. They will also be able to keep any items that have been found, showing as a list on the results screen. While the dungeons serve as the main way to progress the story, they can also be used to strength Sayaka in more ways than one. This is where the Death End system comes into play, a mechanic that has death serve as catalyst for growth, at the cost of suffering.

Each time Sayaka dies, a Death End will play out, providing graphic descriptions of her cause of death. These are brutal in their descriptions, showing grotesque imagery based on the way that she dies. After these death scenes, the player will be returned to Sayaka’s home as if nothing happened, but she will receive a special point. These can be used in the Death End Skill Tree. There are many Death Ends that can occur during the course of the game.
Speaking of the Death End Skill Tree, the player will be able to visit the Café, which acts like a shop where players can use several facilities. Here the Death End Skill Tree can be used to provide permanent stat increases, alongside buffs like reduced damage from traps. These cost varying amounts of Skill Points, meaning that the player will need to die a lot to fully unlock all skills. But they aren’t the only enhancements Sayaka can get.
In the Strain Area, special items called memories and patches can be collected. These items can be added to the weapons in Sayaka’s arsenal. Several patches can be added to a weapon, increasing the power of the attack and defense of the weapons. Then there are memories, which are which apply special effects to a weapon, like changing the attribute and gaining health. The memory slots are limited for weapons so choose wisely.

In the Café, items can be traded for ENI, allowing the player to buy and sell items that can be used during dungeon exploration. There will be special ENI items that are essentially junk, which can be sold for a hefty chunk of change. The stock of items that the shop has changes with each dungeon run, so it is important to check there often. Using the Café isn’t the only way to manage items though, as Sayaka can use her Home with Shina.
While in the Home, the player will be able to use the closet, storing and retrieving items to prepate for a dungeon run. The player can also sell items that Sayaka doesn’t need, saving time if there is no other reason to go to the Café. Sayaka also has a Piggy Bank, which allows her to save money, depositing and withdrawing it when needed. Next is the Figure Viewing mode, where special scenes can be put together in a photo mode, acting like a diorama.
Last to mention for the home is the Email Quests, where special missions are given to Sayaka. Each of these quests will have a special reward for completion, which can be collected when the conditions are cleared. The completion of these missions can provide new figures and stages to use in the photo mode. So it is important to check back with the Quest Emails often, as there will be plenty of rewards to be unlocked by completing them.

Finally, we come to the Subway, which is run by an imposing man in a suit. This is where the “Strain Train” can be accessed, allowing dungeons to be accessed. This is where the player will need to go for events, but can also be used to challenge cleared dungeons. By replaying dungeons, items can be collected and Death Ends can be achieved, allowing players to prep for later delves. A list of enemies can be viewed, showing if they have caused a Death End.
Now with the gameplay covered, it is time to discuss the other aspects of this release, starting with the controls.
Controls – this title uses a rather simple control system, with the inputs for the game laid out in an easy to pick up manner. The tutorials that the game provide make it easy to learn how to play, with the D-pad and Thumbstick controlling movement, alongside the face buttons for the most important functions. The triggers provide additional special functions, like the Vanquish Style for players to use. There is a handy guide players can use for a refresher.

Difficulty – there are three different difficulty settings, providing a vastly different challenge for players. The recommended setting is normal, where Sayaka retains everything regardless of if they die or not. In the Elite setting, Sayaka will lose items and ENI upon death, but in Expert, Sayaka loses everything, resetting her to level 1. These settings offer a wildly different experience, with a very high-risk challenge that can be punishing and brutal at higher settings.
Presentation – visually, this release uses the trademark art style of Nanameda Kei, who created beautiful character art, as well as the disturbing and violent death scenes. These were created in collaboraton with Kedouin Makoto, who is the writer for the Corpse Party series. The graphic nature of the imagery adds to the horror, looking to get a visceral reaction out of the viewer. Then there are the creatures, which are equally as gruesome to behold.
The settings and environments further build the atmosphere, leading to an overwhelming sense of unease throughout the experience. Then there is the sound, with music from the other games, classical music and new tracks that adds to the haunting and unsettling feeling of the game. Last is the voice work, which is entirely in Japanese which made scenes more impactful, making each dramatic and death scene much more intense.

Final Thoughts – having played the first and second Death end re;Quest, I was extremely excited when Code Z was announced. This was followed by disappointment that the Switch version was cancelled, but thankfully we still have the PlayStation release. There is something so unique, so brutal about the horror experienced in Death end re;Quest, which this game did not let up on. It is just presented in a different manner, which keeps it fresh.
This might just be the most intense and violent story yet, surpassing both Death end 1 and 2, which were brutal to begin with. There were moments where the experience caused me severe anxiety, especially during the tense sections of the game. This was most prevelant during times where I couldn’t manage the Sanity meter, leading to panic while trying to survive. I love Japanese horror, as it can be so much more intense than anything seen in the mainstream.
The core gameplay loop, the tension and overall presentation is engaging, keeping me coming back after each brutal death. I wanted to get that little bit deeper and see what was next. There is some mild grinding, as there are items that are required for survival, which can lead to mild frustration when running out and suffering an inevitable death. But I will recommend this to fans of the series and Japanese horror, as it has all of the elements that make them so good.
In the end, I give Death end re;Quest: Code Z a final score of 4.75/5. This is an outstanding horror experience, with a narrative that is as engaging as the gameplay is anxiety inducing, with elements of the other games that tie it all together, making this possibly the best horror game in recent years. If you want to check out this game for yourself, a link to the store will be below.
Link to PlayStation version (HERE)
UPDATE! Steam version now available (HERE)

One thought on “Death end re;Quest: Code Z – PlayStation 4 Review”